Getting Started

Getting Started – Step 1: Install Insiteful

By October 6, 2020February 8th, 2023No Comments
Welcome to Insiteful! Just getting started? You’ll want to start on the 2-click install page.
Insiteful – Quickstart and Install Page
For your convenience, we’ve summarized it briefly here:

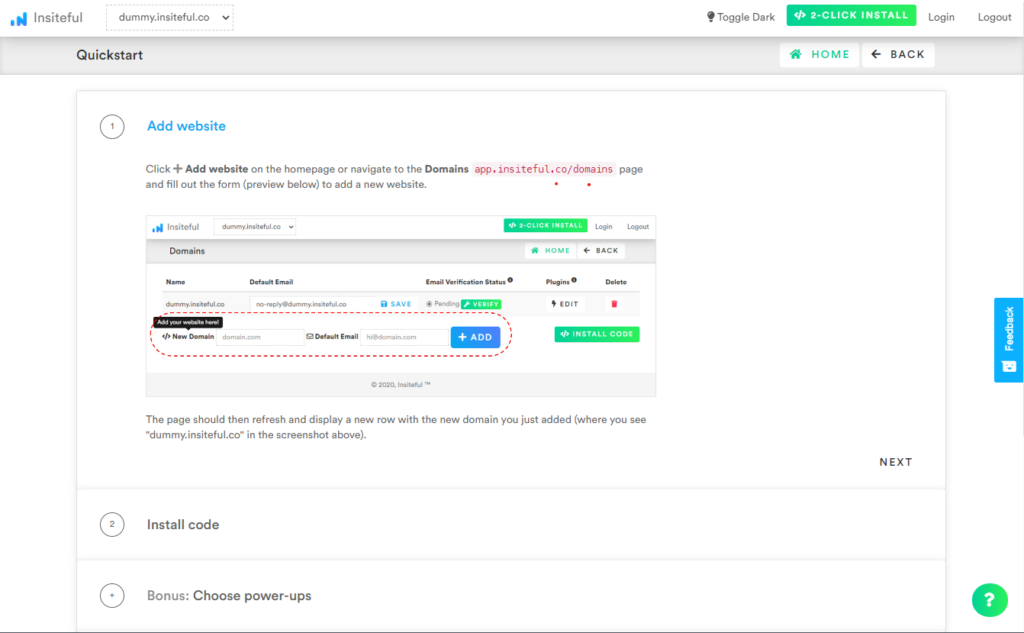
How-to install Insiteful

  1. Add your website: Just login & visit the Domains page and add your website where indicated.
  2. Install code:  Copy & paste the Javascript code on the Install page into the <body> of any web page &/or form(s) you’d like to track and optimize.
…and you’re set! That’s all there is to it—

How-to test your Insiteful partial form tracking is working

Now that you’ve got everything installed, you can easily test it out by either using the Insiteful Debugger extension, or manually filling out a form!

Try navigating to a form where you installed Insiteful and enter some dummy data (e.g. "John Doe"<[email protected]>), then drop off the page without clicking submit / completing your response.

You should receive an email notifying you of the new lead, and the data you entered should pop up on the Leads and Live page — as seen below.

How-to resolve any issues

Having trouble? Make sure you’ve got the correct domain selected in the main domain dropdown (see below).

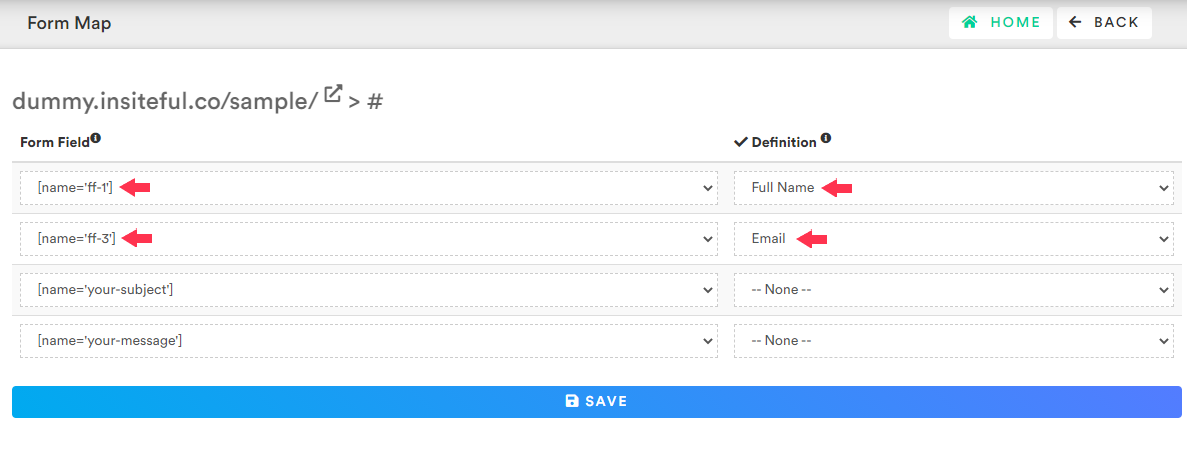
If you notice form tracking working fine (ie. data is appearing on the Live page) but new leads are not being detected, you may need quickly configure your form’s Mapping (est. 2 – 3 minutes). Such forms may require you to briefly manually specify what each form field means: just a few clicks with our intuitive interface (screenshot below), avail

able by clicking the button under “Mapping” on the Forms page. Read more about how-to setup custom form mapping here.

Need further help? Check out these tips on troubleshooting forms and leads, or get more support here.

Was this post helpful?

Get your case studyAvailable for download immediately (no need to check your inbox)!