If your forms are being tracked & Insiteful is capturing your partial form entries (i.e. you can see data appearing on your homepage Activity Log and the Live Form Fill page), but leads are not being detected, you probably need to set up form field mapping—
If you’re experience this issue, that means Insiteful is able to track your forms, but has not yet figured out what each form field’s data actually represents (i.e. name, email). To “teach” Insiteful what each field in your form means, visit login and visit the Form Mapping page:
What is form field mapping?
Form field mapping simply allows you to manually tell Insiteful what each field in your form means.
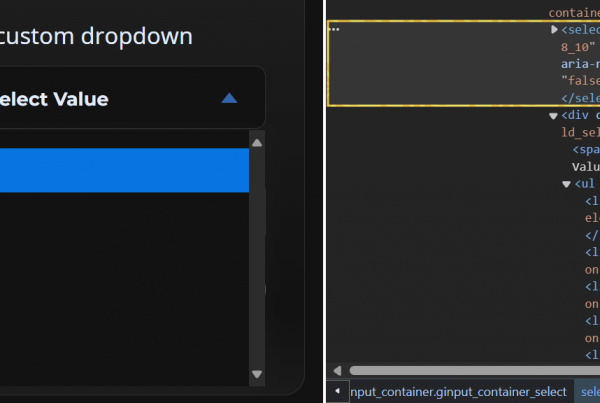
Our software uses the unique HTML id’s in your form to identify different fields. If your form’s unique HTML id’s are generic/chronological (ie. “gform-1”, “input-6”), Insiteful can’t distinguish which fields correlate to lead names & emails. This is no problem — with our built-in Form Field Mapping feature, you can easily set up custom definitions for form fields in a matter of minutes!
How to configure custom form field mapping in Insiteful?
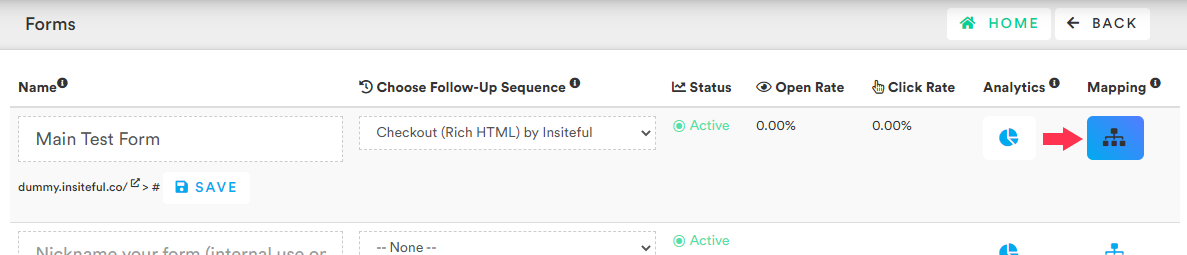
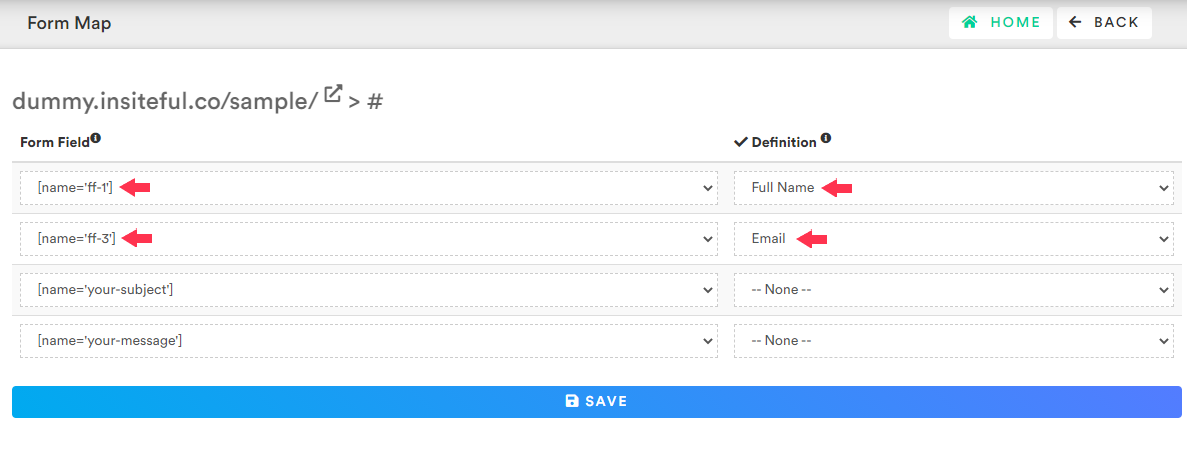
Simply visit the Forms page & click the button under “Mapping” to be redirected to the Form Map page (screenshot below) to configure custom field mapping in Insiteful. All you need to do is to select the corresponding option(s) in the “Definition” dropdown for your form fields and click to “Save.” This will set the custom associations for your form fields so Insiteful can start capturing leads from partial entries detected on your forms!
Form field mapping relies on the partial entries that Insiteful has captured from your form in order to identify all the available fields. As such, you should fill out all the fields in your form at least once before setting up form mapping, so Insiteful has a chance to register all the available fields. Once you’ve done so, it’s usually easiest to configure this by opening the Form Mapping page in one tab, and the Form Entries page in another, so you can easily keep track of the corresponding definitions for each form selector.
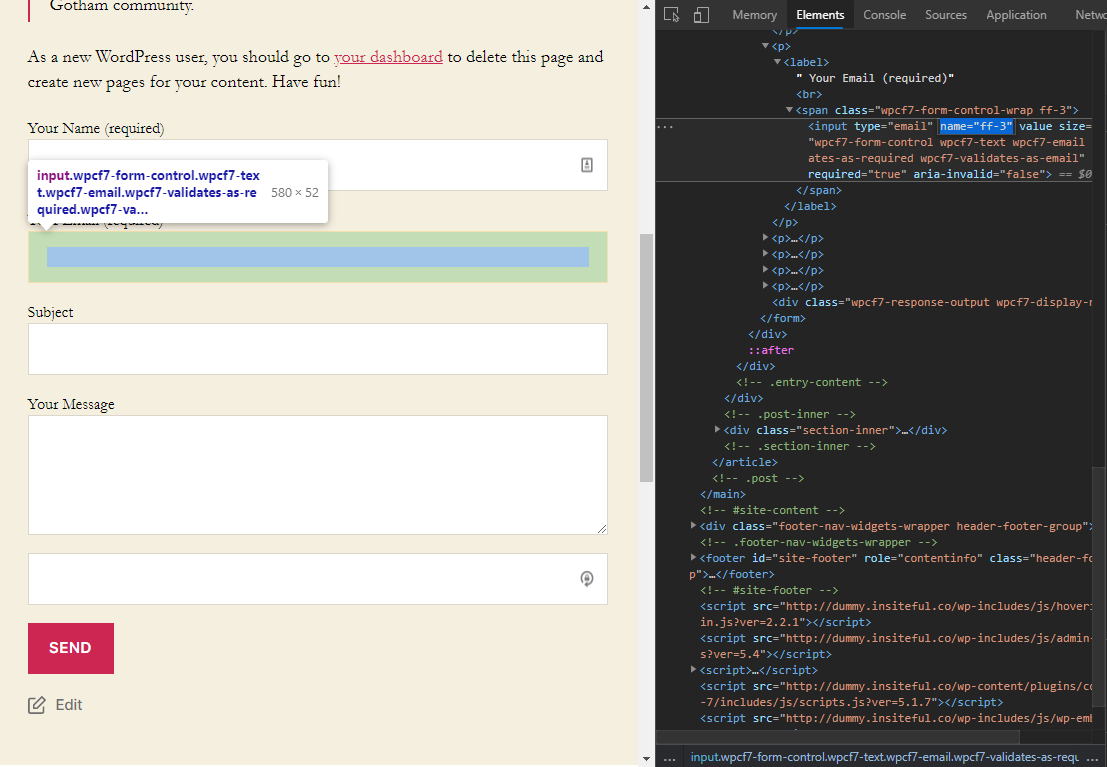
If you’re confused on which form fields to map, simply visit your web form, right-click and choose “Inspect Element.” When you hover on your form fields, the corresponding HTML code should get highlighted, so you can easily view & select the unique HTML id’s (as pictured below).