Insiteful can help you track form entries and more from virtually any web form in just a few clicks. Apart from helping you capture 100% of leads that fill out your forms, our plug-n-play solution also enables you to increase your conversion rate with power-ups (i.e. save & continue later), auto follow-up, and smart insights (i.e. confused / abandoned form fields).
Founded in 2009, Gravity Forms is a versatile form plugin for WordPress, and one of the most popular — perfect for creating web forms & sales funnels for online lead generation!
You can track any forms created with Gravity Forms by following the usual method for tracking web forms with Insiteful, but we’ve included some specific instructions below for your convenience.
Automagically uncover more leads from your WordPress website: capture & convert 100% of the users that start to fill out your Gravity Forms — even those that don’t finish. There’s nothing more disheartening than missing out on a potential opportunity due to form abandonment or website drop-offs; Insiteful is here to seal the leaks in your funnels.
Learn more about how-to easily track, optimize & convert more leads from your Gravity Forms — start capturing form-fill data with Insiteful. In just a couple clicks, your website could never miss another lead.™
We’ll show you here how to track partial entries and incomplete submissions from any Gravity Form below. That said (generally speaking), these instructions should work for any web form (even in non-Wordpress or custom pages):
Troubleshooting multi-page Gravity Forms + Insiteful tracking
There are some special Gravity Forms configurations that may require an additional tracking code, as elaborated below:
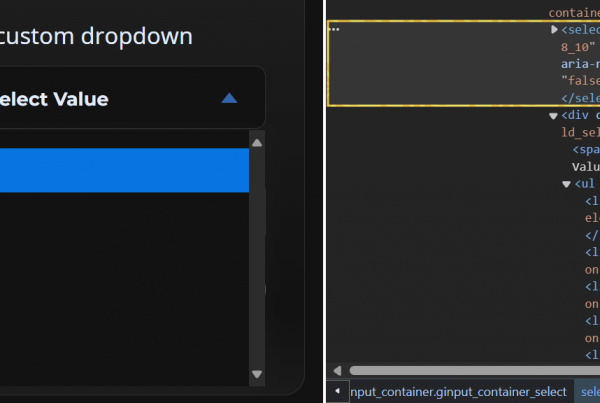
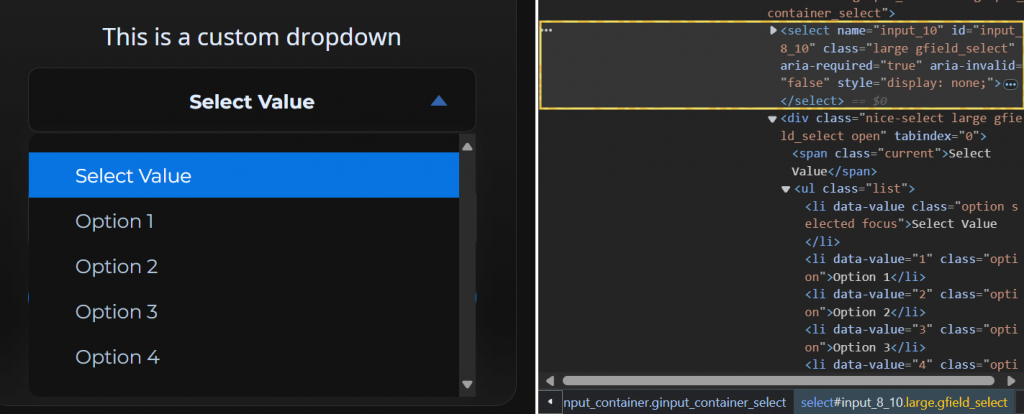
Gravity Forms custom dropdowns
Form builders like Gravity Forms sometimes replace the default HTML <select> tag for dropdowns with a custom dropdown built with divs and other HTML elements that are not standard form inputs. Usually, when you inspect the HTML of these forms, you’ll find a hidden <select> element right next to the custom dropdown HTML, as seen below. Behind the scenes, JavaScript will update the hidden <select> element’s value when a visitor clicks on the visible custom dropdown. Since Insiteful tracking works based on keystrokes, these programmatically-filled, hidden fields may not be captured by the default Insiteful tracking script alone. To workaround this, we have provided an additional, customizable script for tracking custom dropdowns:
In order to properly custom dropdowns in forms that don’t use the default HTML <select> tag for dropdowns, you can simply copy and paste the extra line below after the usual install code:
<script async defer type='text/javascript' src='//a.insiteful.co/dist/track-fancy-selects.min.js?' id='insiteful-fancy-selects-js'></script>

<script async defer>getFancySelectFields(".nice-select"); //REPLACE THIS BASED ON YOUR FORM</script>
Multi-step Gravity forms
By default, multi-step forms built with Gravity Forms will dynamically render hidden or conditional inputs after the page load. To avoid picking up stray data (ie. site search bars), Insiteful does not usually track inputs that do not appear on the initial page load. Fortunately, our team has pioneered a 1-line solution to make this simple—
In order to properly track inputs that don’t appear on initial page load (ie. hidden/conditional fields on multi-page forms), you can simply copy and paste the extra line below after the usual install code:
<script async defer type='text/javascript' src='//a.insiteful.co/dist/check-hidden-inputs.min.js?' id='insiteful-hidden-js'></script>
Thanks to these simple add-on tracking codes, you can easily & reliably track dynamically-rendered inputs or custom dropdowns with Insiteful by adding just one line: just follow the usual installation instructions then paste the line above, and you’ll be all set!
How to track Gravity Forms with Insiteful
How-to capture partial entries from all your forms
Most websites use multiple different types of forms (ie. search forms, newsletter forms, booking forms) — many of which are setup outside of Gravity Forms. With Insiteful, it takes just one tracking code to track any & all forms on your website. While Gravity Forms has their own partial form tracking plugin, it is only capable of tracking entries and form abandonment strictly in forms that were built with Gravity Forms — whereas Insiteful is capable of tracking partial entries from virtually *any* form builder or web platform, for a fraction of the price. Here’s how to set up partial entry & form abandonment tracking with Insiteful for all the forms on your website:
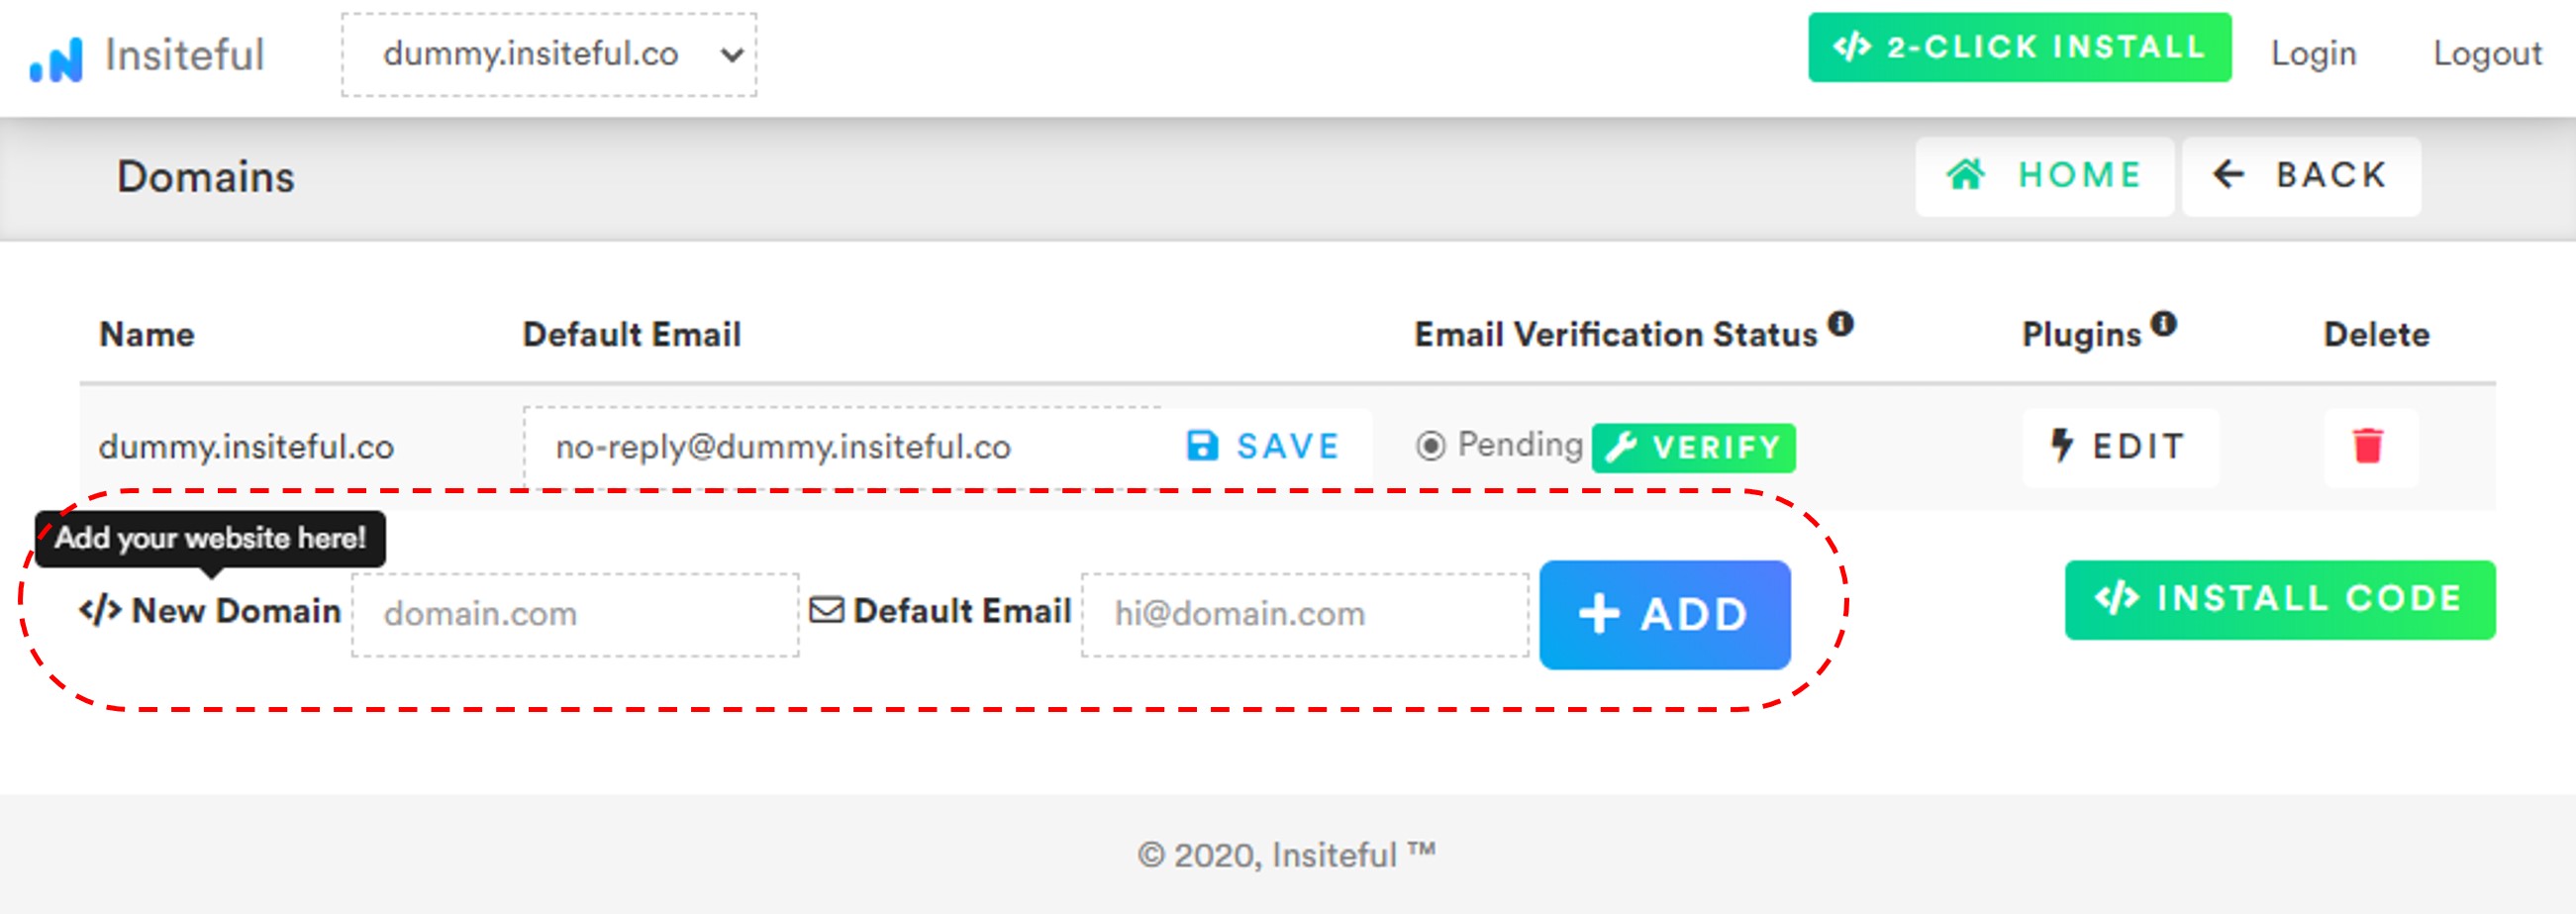
- Add your website: Just login to Insiteful & visit the Domains page and add your website where indicated in the screenshot below.
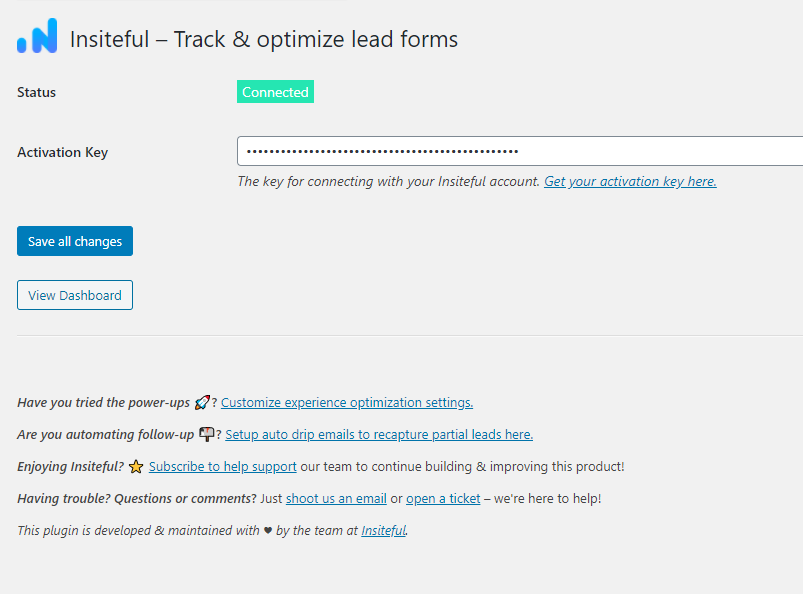
- Install code: Adding Insiteful to your WordPress website is as simple as installing the plugin by downloading here or searching “Insiteful” under Add Plugins.Once you’ve installed the Insiteful plugin for WordPress, simply follow the instructions on the Insiteful settings page (screenshot below): you’ll be asked to copy the activation key from the Install page to confirm your installation. That’s all there is to it!
How-to capture partial entries from just one Gravity Form
- Add your website: Just login to Insiteful & visit the Domains page and add your website where indicated in the screenshot below.
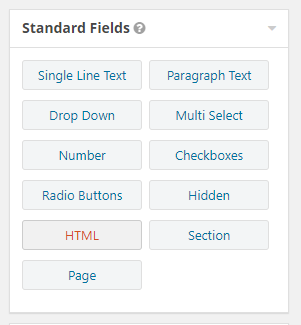
- Install code: Navigate to the Edit page for your the form of your choice in the Gravity Forms section of the WordPress admin panel. Here, add a new HTML field (highlighted below) to your form, then copy & paste the code from the Install page to start tracking this form (details instructions here in the official Gravity Forms knowledgebase).
Alternatively, the Gravity Forms documentation also suggests the free Custom JavaScript add-on from the team at Gravity Wiz as another option to add custom JavaScript (such as the Insiteful install code).

Use Ninja Forms, Contact Form 7, Formidable Forms, Forminator or some other form builder different than Gravity Forms? Insiteful is compatible with any form builder & website platform: click here to browse form tracking instructions for other platforms!