Insiteful can help you track form entries and more from virtually any web form in just a few clicks. Apart from helping you capture 100% of leads that fill out your forms, our plug-n-play solution also enables you to increase your conversion rate with power-ups (i.e. save & continue later), auto follow-up, and smart insights (i.e. confused / abandoned form fields).
Piotnet Forms and Piotnet Add-ons for Elementor are popular form plugins for WordPress users. While Piotnet offers a robust suite of form builder tools, you probably want to look elsewhere for tracking and optimization. In fact, quite a few of our users at Insiteful switched from using Piotnet alone, citing Insiteful’s more accurate & reliable form abandonment tracking functionality!
You can track any forms created with Piotnet Forms or Piotnet Add-ons for Elementor with the usual method for tracking web forms with Insiteful (also included below, for your convenience). However, before you get started, please make sure to read about the important additional step for Piotnet Forms that use multi-step or Google Maps Autocomplete to ensure you’re able to track your web forms accurately Insiteful — nothing complicated, just one additional line!
Want to save lead data from users that start to fill out your Piotnet Forms but don’t finish? It doesn’t have to be tedious. There’s nothing more disheartening than missing out on a potential opportunity due to form abandonment or website drop-offs; Insiteful can help you seal the leaks in your lead forms!
Before you get started with the how-to guide, make sure to complete the preliminary step below:
Troubleshooting multi-page Piotnet Forms / PAFE + Insiteful tracking
By default, multi-step forms built with Piotnet Forms or PAFE will render without a <form> tag surrounding the various form fields (ie. <input>, <select>). To avoid picking up stray data (ie. site search bars), Insiteful does not usually track standalone inputs.
Moreover, the “Places” field in Piotnet / PAFE includes built-in autocomplete powered by Google Maps. Tracking these kinds of forms & fields can be tricky with PAFE, or any software other than Insiteful, for that matter. Fortunately, our team has pioneered a 1-line solution to make it simple —
In order to properly track either of these edge cases and prevent missing form entries, you simply need to copy and paste the extra line below after the usual install code:
<script async defer type='text/javascript' src='//a.insiteful.co/dist/pafe.min.js?' id='insiteful-pafe-js'></script>
Thanks to this simple workaround pioneered by our engineers, you can easily & reliably track any multi-page Piotnet and PAFE Forms with Insiteful by adding just one line. The easiest way to do this is to install a plugin like this and paste the line above, and you’ll be all set!
How to track PAFE / Piotnet Forms
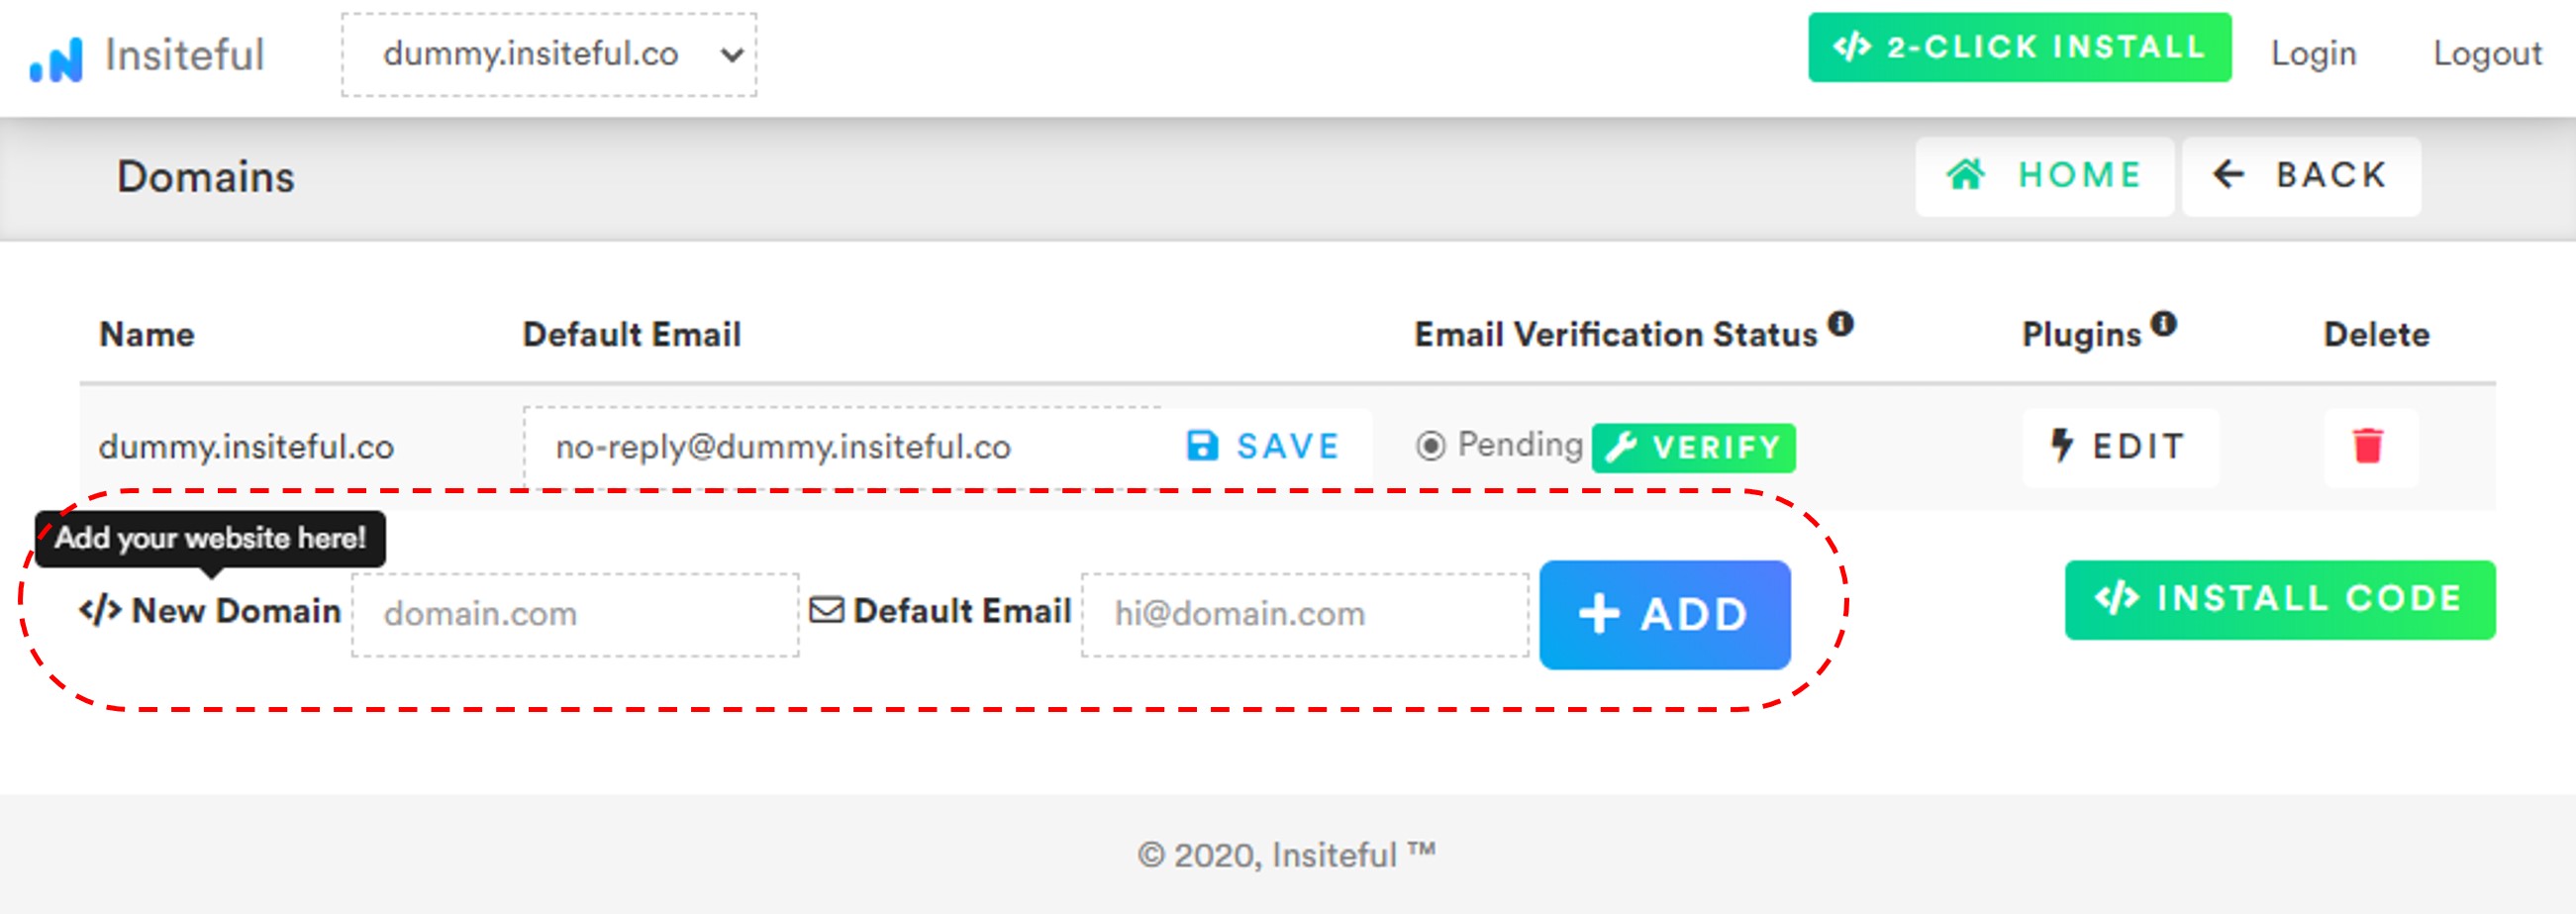
- Add your website: Just login to Insiteful & visit the Domains page and add your website where indicated in the screenshot below.

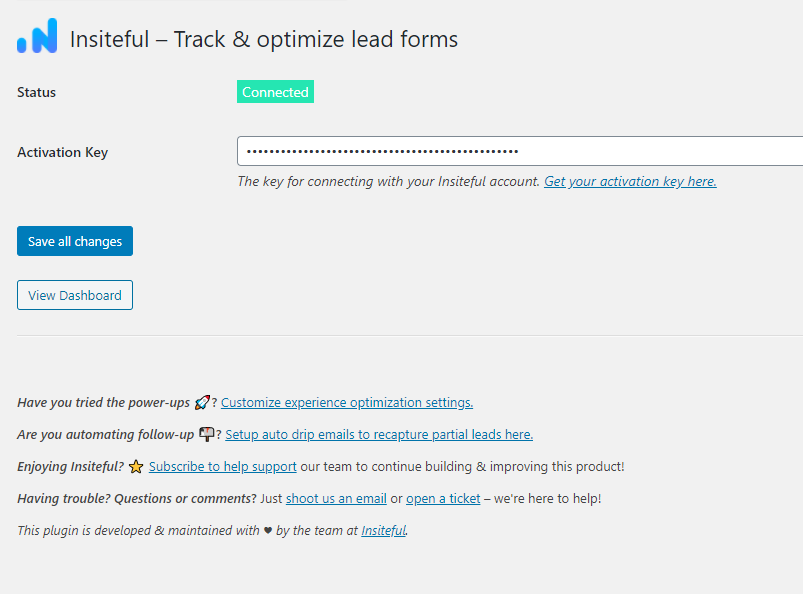
- Install code: Adding Insiteful to your WordPress website is as simple as installing the plugin by downloading here or searching “Insiteful” under Add Plugins. Once you’ve installed the Insiteful plugin for WordPress, simply follow the instructions on the Insiteful settings page (screenshot below): you’ll be asked to copy the activation key from the Install page to confirm your installation. That’s all there is to it!
 Alternatively, if you’d like to track just one form, you can simply add the tracking code to only that page, or instead disable tracking on the forms you’d like to ignore.
Before you can begin, make sure that the Essential Addons plugin for Elementor and its EA Custom JS extension are activated. Once you’ve installed the plugin, navigate to Essential Addons > Extensions in your WordPress admin panel. Look for the ‘Custom JS’ extension and click to activate it. Afterward, click ‘Save Settings’ to save your changes.Next, navigate to the Edit page for your the form of your choice in your WordPress admin dashboard. On this page, go to Page Settings > Advanced > Custom JS then copy & paste the code from the Install page to start tracking forms on this page (details instructions here in the official Elementor knowledgebase).


